Woodpecker Sounds: Drumming, Calls, and Habitat Clues
Learn how to evaluate woodpecker sounds with visible clues, habitat context, and a stepwise comparison workflow to turn recordings into useful ID leads.
Quick answer for woodpecker sounds
Woodpecker sounds are most reliably interpreted when you pair the audio pattern—drumming rhythm, call cadence, or pitch—with visible clues and context. A steady, mechanical drum or a stuttering series of taps points to drumming behavior; short, sharp churrs or single-note “peek” calls point to species-specific vocalizations. Alone, a single recording or photo can suggest possibilities but rarely proves an exact species.
For field use, prioritize three things: rhythm and repetition from the audio (is the beat rapid, even, or cadenced? ), habitat and substrate (open oak woodland, pine plantation, or suburban park? ), and visible marks or posture in photos (bill length, head pattern, and tail barring). These clues survive poor light or partial shots better than subtle color shades or single feathers.
Use the following sections as a short checklist: note the type of sound (drum vs. call), mark the tempo and pitch range, inspect strong visual characters in any photo, and run a comparison workflow. If results stay uncertain, treat your recording or image as a research note and gather a second observation rather than locking in an identification.
Strongest visual clues
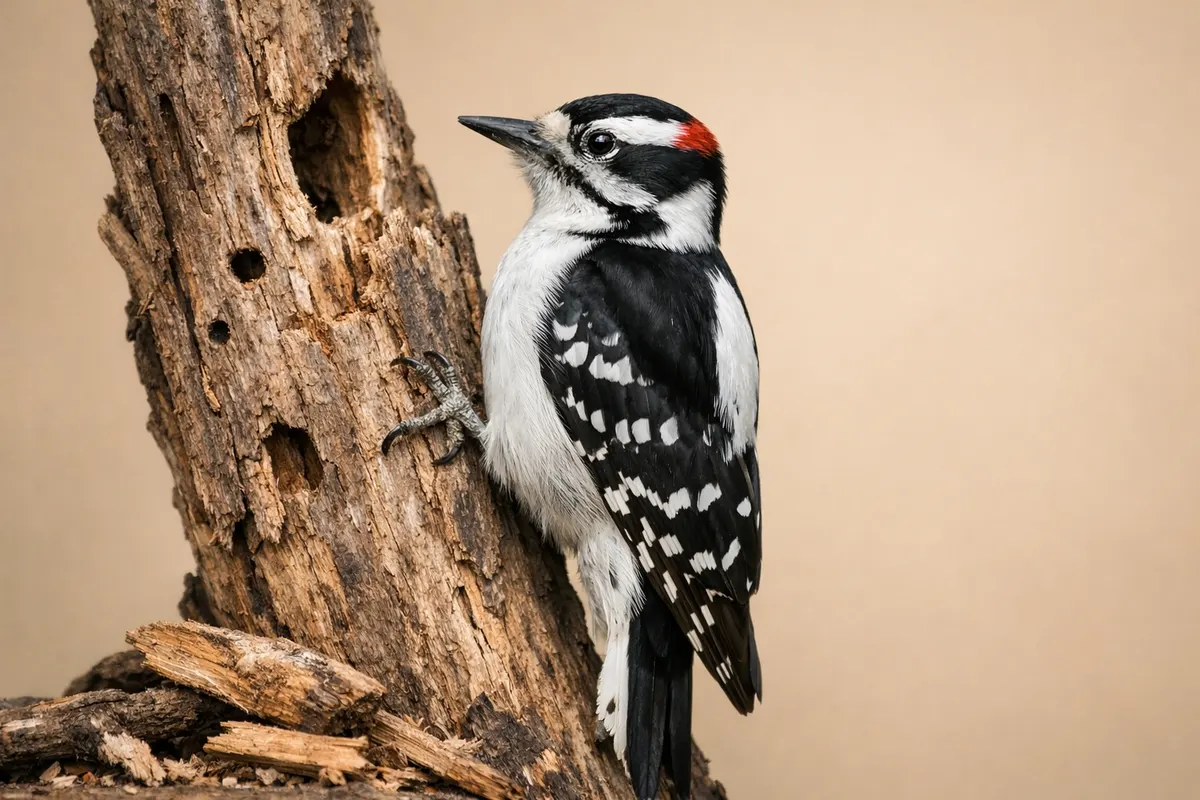
When photos accompany a recording of woodpecker sounds, certain visible details reliably narrow the field even from ordinary phone shots. Look first at head pattern: a bold red crown patch or a plain black-and-white head band are diagnostic for groups of species. Head pattern rarely changes with light and is often visible even in side-profile shots.
Bill size and shape are high-value clues. A long, chisel-like bill suggests a larger woodpecker (e. g. , Pileated or Northern Flicker), while a shorter, stubbier bill points to smaller species. Even when feathers blur, the relative bill length against the head or the tree trunk provides a stable proportion for comparison.
Tail and wing barring are durable markers in many images. Strong white patches on the rump, distinct black-and-white barred tails, or pale wing panels can separate lookalikes at a glance. These features are especially useful when plumage color is washed by exposure or when only the bird’s rear is visible while it drums.
Behavioral posture and substrate complement anatomy: a bird bracing vertically with stiff tail support on a trunk is likely drumming for territory or nest excavation, while a bird clinging to a thin branch or gleaning insect prey might produce different call types. Habitat clues—type of trees present and the presence of dead sapwood—also strengthen identifications.
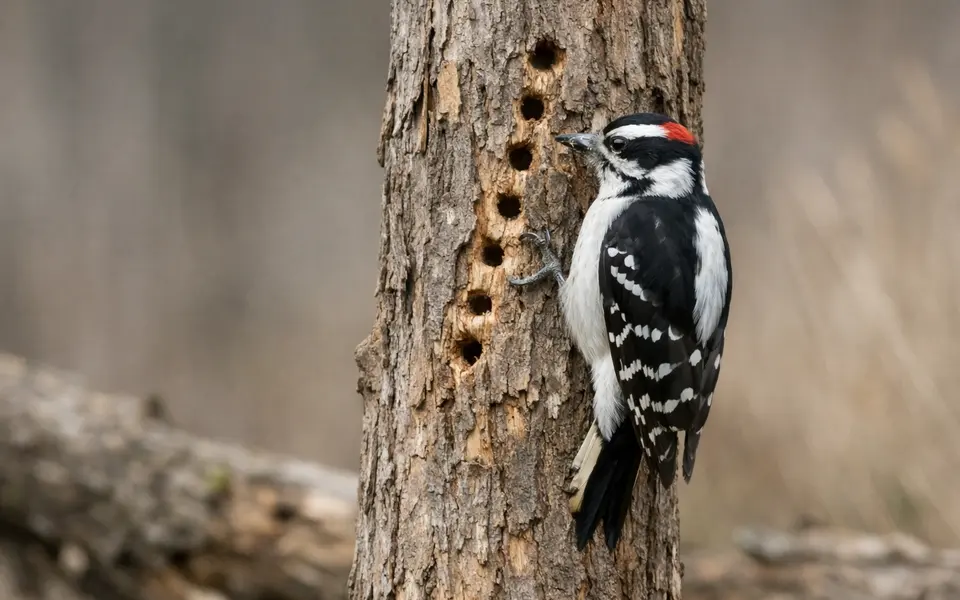
- Head pattern: crown patches, napes, and malar stripes are reliable even in low light.
- Bill length relative to head: long for Pileated/flicker, short for downy/lesser species.
- Tail and wing barring: contrast and rump patch help separate common species.
- Body posture: stiff-tailed trunk-clingers vs. more acrobatic branch-foragers.
- Substrate: drumming on resonant, dead trunks produces a different tone than tapping on thin branches.
- Habitat context: mature deciduous forest, pine stands, and suburban dead trees favor different species.
- Size cues: compare bird to branch thickness or nearby leaves for scale estimates.
- Feeding signs: chips, rectangular excavation marks, or sap wells indicate specific foraging styles.
Weak signals
Some visual details are tempting but unreliable for identifying woodpecker sounds from casual photos. Color shades—like how bright a red patch looks—change with exposure, white balance, and wear on feathers. Avoid using subtle hue differences as a primary ID clue unless the photo is well-exposed and crisp.
Glare, blur, and single-angle shots can create false impressions of patterns. A washed-out photo may hide distinct wing patches, and a partial head turn can mask crown markings. Likewise, juvenile plumage and shear wear can mimic adult patterns from certain angles, so labeling a species from one ambiguous image risks error.
Don't depend on single-behavior snapshots as proof. A bird captured in flight or mid-drumming might display temporary posture or feather positions that mislead. Use these weak signals only as secondary support after confirming stronger characters like bill proportions, head patterns, and habitat context.
- Subtle color tone differences (red vs. orange) are low-confidence without a high-quality image.
- Single photos that crop out the tail or rump deprive you of key separating marks.
- Juvenile plumage and feather wear can mimic multiple adult species.
- Backlighting and overexposure can erase diagnostic white patches or bars.
- Assuming size from a photo without a reference object often misleads.
Comparison workflow
Turn recording plus photo into a practical ID by layering evidence: audio pattern, three visual anchors, habitat, and season. Start with the sound: classify it as drumming (rapid, percussive taps) or vocal call (notes, churrs, peeps). Note tempo (taps per second), repetition pattern (steady roll, double taps, or irregular bursts), and pitch (low, mid, or high). This audio-first step narrows candidate species quickly.
Next, check three visual anchors in photos: head pattern, bill size, and tail/wing contrast. Match those anchors against species profiles for your region. For example, a long bill, bright red crest, and loud, steady drum points toward large species; a small bill with a broken white wingbar and high-pitched peeps suggests a small woodpecker species.
Bring habitat and season into the comparison. Some woodpeckers favor mature deciduous forests or mountain stands, while others are common in suburban parks or dry scrub. A drumming sound near sapwells in spring suggests territory or nest work; a series of alarm-like calls during winter flocking points to different behaviors and possibly different species.
If several candidates still match, rank them by confidence and list the weakest assumptions. Treat the top-ranked candidate as a prioritized lead rather than a confirmed ID. If possible, plan a follow-up: try to capture a clear shot of the head or tail next time, or make a longer recording to reveal additional vocal elements.
- Audio first: drum vs. call; note tempo, repetition, and pitch.
- Visual anchors: head pattern, bill length, tail/wing contrast.
- Context: substrate, habitat type, and season narrow likely species.
- Confidence ranking: prioritize matches with multiple independent clues.
- Follow-up plan: target missing views (tail/rump/head) or a longer recording.
App workflow
After you’ve checked visible clues, use Bird Call Identifier - Featha as a first-pass research tool on your phone to compare patterns and suggestions. Start by noting the audio type (drum or call) and the three strongest visual anchors you observed. Enter the region and approximate habitat when prompted to narrow regional candidate lists.
Recordings work best when you capture at least 10–20 seconds of uninterrupted sound and mention any nearby noise in your notes (running water, wind, traffic). For photos, try to include at least one image showing the head in profile and one showing the tail or back. If you can’t get both, prioritize the head pattern and bill proportion—the app’s suggestions will be stronger with those elements.
Treat app results as hypothesis-generators rather than final answers. Use the app’s suggested matches to refine which field marks to seek next and to plan a follow-up observation. If the app gives multiple plausible species, record which visual or audio clue would rule each one in or out and attempt to collect that evidence on your next visit.
If you want a second angle on what a call might mean, related discussion can help—see our guide Bird Alarm Calls vs Contact Calls: What Common Sounds Might Mean for more context on call function and behavior (https://birdcallidentifier. app/blog/bird-alarm-calls-vs-contact-calls).
- Capture 10–20 seconds of clean audio and log background noise.
- Include at least one head-profile photo and one tail/rump shot if possible.
- Enter region and habitat in the app to limit local species suggestions.
- Treat results as leads—gather additional photos or longer recordings to confirm.
Related guides
Try Bird Call Identifier - Featha after your clue checklist
Once you’ve noted the drum vs. call, recorded tempo and pitch, and captured at least one head or tail photo, open Bird Call Identifier - Featha on your phone to generate likely matches for your region. Use the app’s suggestions as research leads, not final proof—gather a follow-up image or a longer recording to confirm any tentative ID.

Frequently asked questions
How can I tell drumming from a vocal call in a short recording?
Drumming is a percussive sound produced by bill strikes: it usually has a rapid, even tempo and no harmonic overtone structure. Vocal calls are tonal or atonal notes with pitch and a frequency pattern—peeps, churrs, or whinny-like sequences. If the sound is a rapid, regular roll without clear pitch, treat it as drumming; if it has discernible note structure or rising/falling pitch, it’s a vocal call.
Which habitat clues are most useful for narrowing woodpecker species?
Tree type and condition are the most informative habitat clues: mature deciduous woods, dead snags, or pine plantations each favor different species. The presence of large standing dead trees and old snags suggests larger excavators; frequent sightings on fence posts and shallow-barked trees point to smaller species. Suburban parks with short, scattered trees often host adaptable, generalist woodpeckers.
What should I photograph to make my woodpecker sound evidence stronger?
Prioritize a side-profile of the head, a tail-or-back view showing barring or rump patches, and a contextual shot that shows the bird’s size against a branch or leaf. Also photograph the substrate where drumming is heard—dead trunks, branches, or fence posts—to link sound to likely behavior. These images together strengthen any audio-based identification.
Can a single recording identify a species confidently?
Sometimes a very distinctive call or drum pattern can strongly indicate a species, but more often a single short recording leaves ambiguity. Use the recording alongside photos, habitat notes, and seasonality to build confidence. If uncertainty remains, treat the observation as provisional and seek follow-up sound or visual confirmation.