Owl Calls at Night: Hoots, Screeches, and Timing Clues
Discover which photo clues support identifying owl calls at night, which details mislead, and the practical checks to use before accepting an ID.
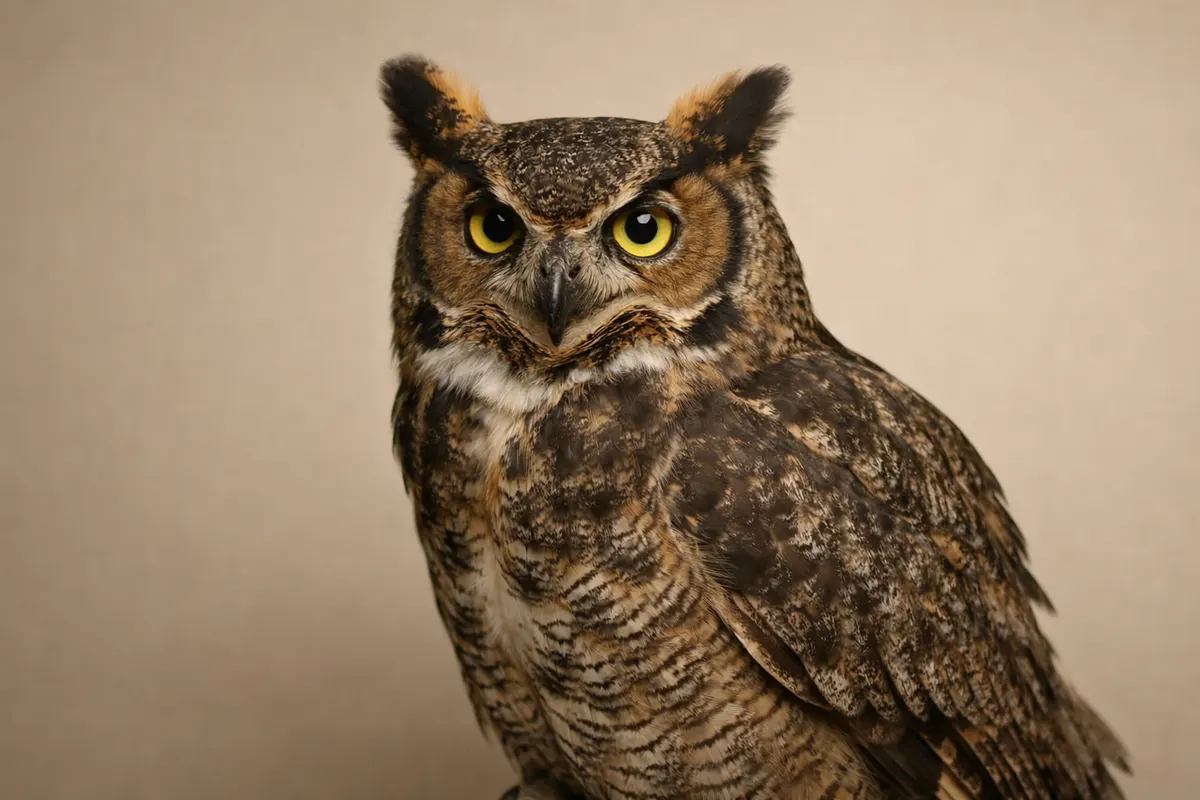
Quick answer: what night photos can tell about owl calls
A single night photo can often confirm a handful of reliable clues that support an audio-based suspicion: overall size relative to a branch or nearby object, a rounded facial disk, presence or absence of ear tufts, and distinctive posture or silhouette. If you heard a hoot and the bird in your picture is a large, tufted owl with a deep chest and broad head, that combination strengthens the likelihood of species like a Great Horned Owl—but it’s still only a probabilistic match, not proof.
Timing and context add weight. Hearing a series of low, spaced hoots around midnight from a large bird perched high supports certain species more than others; a high-pitched, tremulous trill heard after dusk combined with a small, rounded bird on a low branch points toward small screech owls. Use time-of-night, habitat (open field, forest edge, barn), and behavior (flying vs. perched, hunting posture) as additional clues alongside the image.
Some visible features are much weaker signals at night: exact plumage color, fine streaking, or subtle pattern differences often vanish under limited light, infrared, or smartphone flash. Urban glare, motion blur, and the angle of the bird can create misleading impressions—so treat any single photographic clue as suggestive, not definitive.
Practical rule: gather multiple clues before committing to a species ID. Combine the sound description (hoot, screech, trill), the photo evidence (size, ear tufts, facial disk, silhouette), and context (time, habitat, behavior). If those clues point to the same candidate, you have a reasonable working hypothesis to test with further observations or an app-assisted scan.
- Photos reliably show size vs. surroundings, silhouette, ear tufts, and facial disk shape.
- Sounds plus time and habitat strengthen a photo-based ID; use them together.
- Night photos rarely prove fine plumage details or exact color—treat those as weak signals.
- Always treat a single photo + sound as a working hypothesis, not final proof.
Strongest visual clues to pair with owl calls at night
When working with night images, prioritize clues that hold up under low light and typical smartphone shortcomings. Size relative to a known object—branch thickness, fence posts, or a nearby lamppost—gives a surprisingly robust anchor for separating large owls (e.g., Great Horned or Barn Owl) from small species (e.g., Eastern Screech-Owl or Northern Saw-whet). Note: estimate conservatively; a distant bird will look smaller in the frame.
Facial disk shape and proportions are resilient in dim conditions. Many owl species have diagnostic face shapes: a heart-shaped disk for Barn Owls, a round and compact face for saw-whets and screech owls, and a broader, more flattened disk for barn or larger forest owls. Even when color washes out, the disk outline and the way light catches the face can remain visible in well-composed shots.
Ear tufts (plumicorns) or their absence is another durable clue. Great Horned Owls, Long-eared Owls, and some others show clear tufts when perched; Barred and Barn Owls do not. In silhouette, tufts project above the head and are often visible against the sky or a lighter background. Be cautious: tufts can fold or be obscured, so treat presence as strong evidence but absence as only suggestive.
Posture, silhouette, and wing/ tail shape survive many night photography problems. Perched owls often show upright postures with a compact body and head-on-facing eyes that reflect light. Flying silhouettes (broad wings with rounded tips for large owls; narrow, rapid wingbeats for smaller species) help differentiate types when you can capture a clear outline.
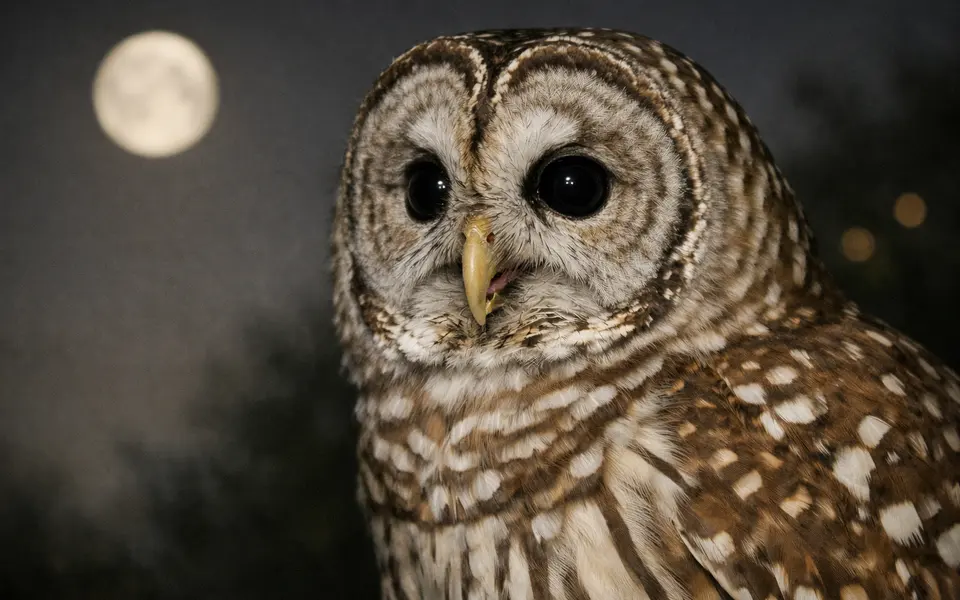
- Estimate size using nearby objects in the frame—this helps rule broad groups in or out.
- Use facial disk shape (heart-shaped vs. round) to separate Barn Owls from screech/saw-whet types.
- Look for ear tufts in silhouettes; their presence is a strong trait when visible.
- Analyze posture and wing/tail silhouette for additional separation between large and small species.
Weak signals to avoid over-weighting at night
Color is unreliable in night photos. Camera sensors and artificial light can shift hues dramatically: a gray owl may look brown under sodium-vapor streetlights or washed white under a flash. Subtle streaking or warm tones that matter for daytime IDs often disappear into noise, so avoid forcing a color-based identification from a single nighttime image.
Glare, eye-shine, and motion blur create deceptive cues. Eye-shine color varies with angle, distance, and the health of the bird, and should never be used alone to determine species. Similarly, a flash or nearby car headlights can flatten texture and exaggerate patterns; motion blur can smear wingtip shapes and mimic long tails or ear tufts.
Single-angle photos can mislead about bill shape or facial proportions. A head-turned photo will change the apparent width of the face disk and hide key field marks. Juveniles and molting birds complicate matters further: they may lack adult markings or show patchy feathers that misread as distinct species traits.
Ambient context can be a trap: an owl perched on a barn may tempt you to think 'Barn Owl' even if the silhouette, face shape, or call doesn't match. Let multiple clues converge rather than letting a single contextual hint decide your ID.
- Avoid relying on color or subtle plumage in night photos.
- Do not treat eye-shine color as diagnostic by itself.
- One-angle shots can misrepresent facial disk and bill shape.
- Context (barns, urban lights) is helpful, but don’t let it override physical clues.
How to compare clues when you hear owl calls at night
Start by making a concise checklist: sound description (hoot, screech, trill, krek-krek), time of night, habitat, and your photographic clues (size estimate, facial disk shape, ear tufts, silhouette). Use the checklist to rule out broad groups quickly: large vs. small, tufted vs. not, heart-shaped face vs. round. This binary filtering reduces the candidate pool before you weigh more ambiguous traits.
Next, create candidate matches from field guides or memory—three good matches is a practical limit. For each candidate, list the expected combination of sound and visual traits. For example: Great Horned Owl — deep, spaced hoots; large size; ear tufts; bulky silhouette. Barn Owl — prolonged screech; heart-shaped face; long legs; open-field habitat. Compare those lists against your checklist and mark how many traits align.
Weigh the clues rather than counting them evenly. Some matches matter more: a matching sound-plus-size-plus-facial-disk is stronger than a matching color plus habitat. Use tiers: high-confidence clues (size, facial disk, ear tufts, distinctive call pattern), medium (posture, silhouette), and low (color, eye-shine, single context hints). Prioritize candidates with multiple high-confidence matches.
When candidates remain ambiguous, plan follow-up checks: attempt a quieter approach to record audio, note exact perch height, or return at the same time the next night. Keep a short field note (time, temperature, moon phase, call transcription) attached to your photos. Those extras make later verification—by experts or with an app scan—more reliable.
- Make a quick checklist of sound, time, habitat, and photo clues.
- Form up to three candidate species and compare expected trait bundles.
- Prioritize high-confidence clues (size, facial disk, ear tufts, call pattern).
- If ambiguous, plan simple follow-ups: record audio, revisit at the same time, and take comparative photos.
Use the app after checking visible clues and timing
Before opening any identification app, assemble the evidence you collected: several photos from different angles if possible, the time and location, and a brief description of the sound (single hoot, repeated hoots, screech, trill). This package—visuals plus contextual notes—gives the app or a community expert the best chance of a helpful result.
When you scan photos with an app like Bird Call Identifier - Featha on your iOS device, feed it the strongest clues rather than a single ambiguous image. Note in the app whether you heard a hoot, screech, or trill and add the time of night; these metadata points often change the app's candidate ranking. Remember that app results are probabilistic: treat them as a prioritized list to investigate, not as definitive proof.
If the app returns uncertain or conflicting matches, use its suggestions as a research checklist: compare the app’s top candidates against your original checklist of size, facial disk, ear tufts, and behavior. If the top candidate lacks more than one high-confidence match from your notes, keep investigating with follow-up photos or audio recordings rather than locking in the app result.
Finally, document the process in your own files. Save the photos, the audio clip if you made one, timestamps, and your checklist. Those records make it easier to cross-check later or share with a local birding group for confirmation. For broader reading about nighttime bird sounds and context that can influence how you interpret calls, consider resources such as the nearby guide on bird chirping at night: https://birdcallidentifier.app/blog/bird-chirping-at-night
- Assemble photos + time + sound notes before scanning in the app.
- Add sound description and time metadata in the app to improve candidate rankings.
- Treat app matches as probabilistic suggestions—verify with high-confidence clues.
- Save your photos, audio, and checklist for later review or expert confirmation.
Related guides
Try Bird Call Identifier - Featha after you check the clues
After you collect your photos, note the call type, and record the time and habitat, use Bird Call Identifier - Featha on your iOS device as a first-pass scanner to generate candidate matches. Add your sound notes and multiple images to improve results, then treat the app’s suggestions as research leads—follow up with more photos, an audio recording, or local expert input before settling on a species.

Frequently asked questions
Can I identify an owl species from a single night photo?
You sometimes can narrow to a small group with one photo if it clearly shows size, facial disk shape, or ear tufts and you also have a distinctive call. However, a single photo rarely proves a species conclusively because low light, angle, and motion can hide diagnostic details. Treat any single-photo ID as a working hypothesis and look for corroborating evidence—additional photos, a clear audio recording, or repeat observations.
How do hoots, screeches, and trills change which visual clues matter?
Different call types correlate with different size classes and behaviors. Deep, spaced hoots typically come from larger owls (so size and broad silhouette matter most); prolonged, sibilant screeches are common with Barn Owls (heart-shaped face and long legs are key); high-pitched trills and tremolos often match small screech or saw-whet species (look for a compact body, round facial disk, and low-perch behavior). Use the call type to prioritize which visual clues to inspect.
What are the safest ways to photograph owls at night?
Use a tele lens or zoom on your phone to avoid disturbing the bird, stabilize your camera on a tripod or steady surface to reduce blur, and take multiple shots from slightly different angles when possible. Avoid using a bright flash directly into the bird’s eyes; instead, rely on ambient light or a low-power fill that doesn’t startle the owl. Record the time, location, and a brief sound description immediately after the encounter to preserve context.
How much should I trust eye-shine color or infrared photos for identification?
Treat eye-shine color and infrared imagery as low-confidence clues. Eye-shine varies with viewing angle, light source, and the eye’s tapetum lucidum, and infrared can flatten or invert contrast that normally indicates patterning. Use these cues only alongside stronger traits like size, facial disk, ear tufts, and call patterns; never rely on eye-shine or IR alone to identify a species.